
Guidelines for Embroidery Design
Key elements for embroidered patches/badges: base, design/text, border & backing.
For printed badges, the design is generally printed as it is.
However for embroidered patches, these 4 main things determine badges: the base, the design/text to be embroidered, the border and the backing.
Here are some important rules to help you create amazing embroidery designs that get approved without being adjusted much:
Base
Mainly 2 options:
*Twill fabric - the most cost-effective option, so it is often used.
*100% embroidery - With enough budge, it can present in a very luxurious way.
Design/Text
Embroidery is the combination of stitching threads and fabric, there are physical limitations, so please keep in mind, the bigger, the simpler the better.
- Best to design in Adobe vector file (.ai, .eps, .psd, .pdf), but if you only have in .png or .jpg, it's also OK.
- Design resolution: 300dpi is recommended.
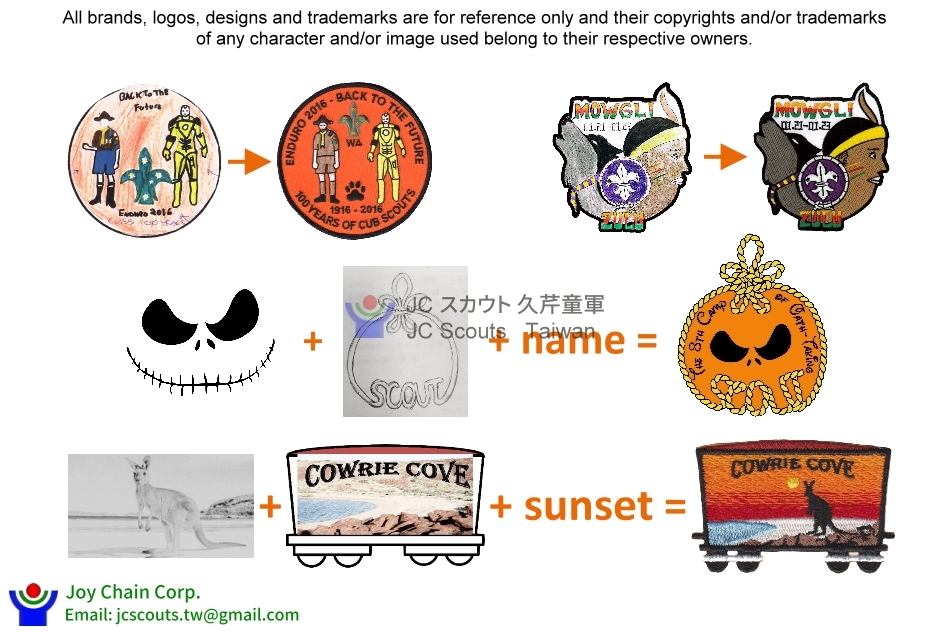
- If your file is too small, our graphic design team can vectorize your design.
- Hand-drawn designs and reference images are also OK. Don't worry if you're not good at drawing on the computer.
- Design in 1:1 scale
- Use solid colours instead of gradients
- Use sans-serif fonts and bold text
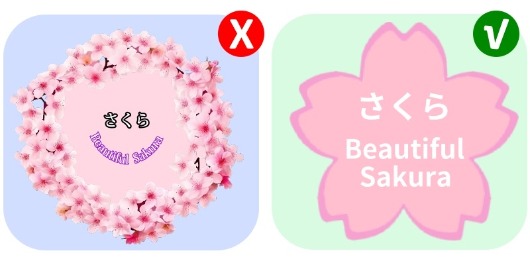
- Use bold lines and clean shapes.
- Avoid small details and outlines in text and designs.
→ Alphabet and numbers best be at least 0.5x0.5cm
→ Gaps in patterns and spacing between characters best be at least 0.2cm
→ If it is a freehand sketch, use a 0.1cm marking pen
Thread Colours
There is no limitation to the number of colours that can be used to embroider your patches. However, 7~9 colours is the standard and the cost-effective amount for small badges and limited budget.
Maximum of 12 colours is recommended.For more than 12 colours, there will be a small additional charge for each additional colour.
Border
There are two methods: merrow border (overlock) and laser cut.
- Merrow border: very classic, traditional and vintage look.It is ideal for circle, oval, square and rectangle patches. The average width is about 0.4cm so it is important to take the width of the merrow border into consideration when deciding the size of your design.
- Laser cut: gives a sleek, trim and clean look.It's best for small patches or shapes have jagged uneven edges. It is suitable for applying iron-on adhesive sheets or Velcro to the back.
Backing
There are 4 main options to choose from.
- No backing: finished patches are soft and easy to sew on apparel
- White or black woven paper: An upgrade option to improve the overall look of the patch
- PVC (plasic): adds stiffness and support to the patchesIron-on (heat seal): can be applied to your garment via home iron
- Velcro: for uniform or garment already has a loop fastener area, or plan to have a fixed area for patches.